Saturday, July 21, 2012

Birch Trees Project


The kids really liked this project.  It was my take on a project I saw at a faithful attempt.
Despite having many steps it actually only took about an hour to complete (including drying time with the help of the Arizona sun).

This project included:
Tape and rubber cement masking
Oil pastels
Watercolor
Salt texture
Paint scraping

The Step-by-Step:


Use tape to mask where the trees will be. Be sure the tape touches the top of the page. Trim the bottoms different lengths (good time to talk about foreground, middle ground and background).

Drip or paint rubber cement across the page in wavy wind-like designs (to be rubbed off later.)

Use oil pastels to draw some detail lines on the ground. Most of the kids choose greens for grass. Ella used browns to create a rocky ground.


Using a wide, flat brush, paint the sky with watercolor working back and forth in rows of different colors. Use plenty of water and paint wet-on-wet so the colors blend together.
Paint over the ground to fill in around the oil pastels. 
When the ground is dry, paint diagonal shadows under the trees.


Sprinkle sea salt on wet paint for texture.
Let it dry. Be patient.


Peel off tape and use a rubber cement pick-up to remove the rubber cement.


Dip the edge of a stiff card (like a credit card) in black paint. 


Carefully place the card on the edge of a tree and drag it across.  I had the kids practice this technique first on another page to figure out how much paint was needed and the best way to swipe the card.


Our Birch Trees:


Saturday, July 14, 2012

Rainbow Art Party- Make an Art Gallery


The party-goers displayed their creations in the Gallery until time to leave.
To make this, I covered a picture on my wall in wrapping paper and hot-glued on dollar store clothespins. I didn't have any plain wrapping paper, so I turned it over and used the white side.
See more of Ella's Art Party here.


Friday, July 13, 2012

Pop Out House (Paper Cutting Project for Kids)


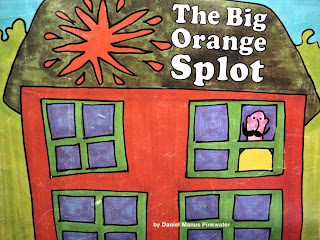
This project was inspired by the book "The Big Orange Splot". The story is about one man's unique house on a street of boring, cookie-cutter houses. 


Each artist was encouraged to design their unique house. 
In contrast, the other houses on the street were to be boring and alike.
In order for the house pop out correctly, it must be drawn an inch longer on the bottom. The photo above shows how the drawing should look when lying flat.

After drawing and coloring their picture, they folded the paper along the ground line and then cut along the right and left sides of the house to make their house pop out. 


Tuesday, July 10, 2012

Kid Art - learning about pencils and shading


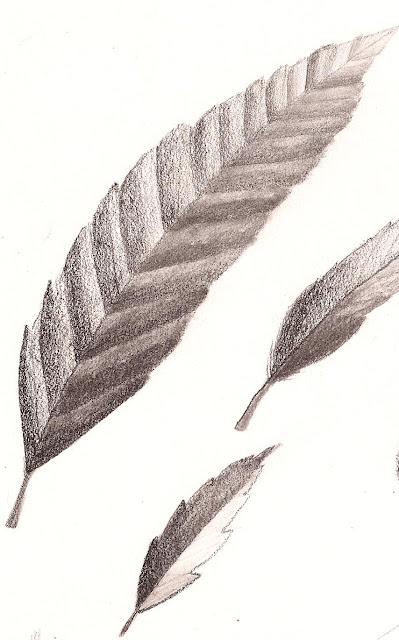
Use shading feathers as a fun way for kids to learn about different pencils.


Draw the feather.
Have the kids draw the center line and outline of a feather. 
Divide the feather into sections with lines shaped like a "v".
Shade the feather.
Begin shading at the bottom of the feather with the softest pencil and work upward.
Start each new section with heavy pressure and gradually ease the pressure until reaching the next section.  Switch pencils at each new section transitioning from soft to hard.  (8B,6B,4B,2B,B,HB,2H,3H,4H)
Blend the feather. 
Blend one side of the feather with a tortillon.

Also try:
Shade half a feather with the softest pencil and the other half with the hardest pencil.
Shade a feather with any one pencil and blend one side with a tortillon.


Sunday, July 8, 2012

Friday, July 6, 2012

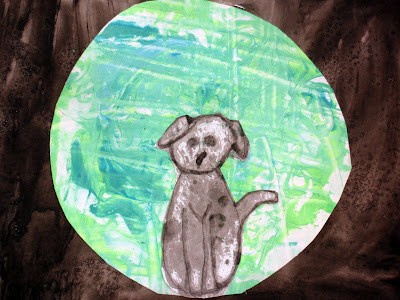
The Dog in the Moon Art Project


This mixed media project included:
Eye dropper painting
Splatter painting
Shaving cream painting
Watercolor wash and salt texture
Collage
Drawing


Each artist created a simple line drawing of a dog.
Using an eye dropper, they traced their pencil lines in black watercolor.
They dipped paintbrushes in the leftover paint to splatter spots on the dogs.


While the dogs dried outside, they worked on the background.


A page was covered in black watercolor wash
and sprinkled with sea salt while it was still wet. This page was also set outside to dry.


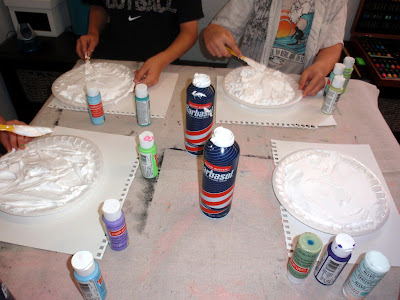
Another paper was used for the shaving cream painting.
Each artist sprayed a plate with shaving cream and smoothed it as best as possible.
They each choose 3-4 colors of paint and squirted them across the shaving cream.
Using toothpicks they swirled and mixed the paints together.


A blank paper was pressed down on top of the mixture.
After letting the mixture sit on the paper for a minute, each artist scrapped off the shaving cream and an unique paint pattern was left behind. A large circle (moon) was drawn and cut out of the shaving creamed paper and pasted to the black background page.

After the dogs were cut out, they were assembled and glued to the moon.


Sunday, July 1, 2012

Rainbow Art Party


Ella's  Rainbow Art Birthday Party was a success!  The kids moved freely from station to station participating in activities and creating art.  They got messy in the backyard with paint.  They hung their artwork in the gallery (see it here).  They took pictures in the photo booth (see it here).  After the seven-layer rainbow cake, they went home with rainbow power streamers (see them here) and goodie jars filled with crayons and other colorful party favors.

Goodie Jars


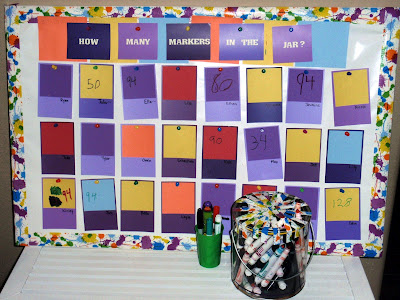
 Guess how many markers are in the jar Game


Fill a jar with water and a couple drops of dish soap then shake, shake, shake....


The guests each dressed in a color from the rainbow.


Working on melted crayon art.


Scratch Art and Rainbow Prism Stations


Making rainbows with flashlights and prisms.


Making marker cap necklaces.


Experimenting with dropping watercolors onto shaving cream clouds.

Marble Painting


Spraying coffee filters with liquid watercolors to make coffee filter butterflies.


After